Add Video to Your Marketing: Top Ten Reasons

Comment

Add Video to Your Marketing: Top Ten Reasons

It’s a proven fact that “video" in content marketing is on the rise by companies of all sizes. Consider this fact: YouTube is now the second largest search engine! But many companies and brands still think of video as an afterthought, but the awareness (and sales) that it can drive for your business means that it’s time you made it a key component of your marketing strategy. Need more convincing? Check out the “Ten Reasons” listed below that highlight the importance and value of video.

#10: Improved SEO

First off, utilizing video in your content marketing efforts will no doubt improve your SEO. In fact, according to Comscore, adding a video to your website can increase the chance of a front page Google result by 53 times when properly executed as part of an SEO plan.

#9: Higher Engagement

We’ve heard over and over that visual content is the key to great engagement. Video is no exception. So when you’re considering what types of posts to schedule on social networks in the coming weeks, think video: audiences are about 10 times more likely to engage, embed, share, and comment on video content than blogs or related social posts.

#8: Stronger Consumer Attention

Videos have been proven to demand more consumer attention than any other medium. And while we’re in the midst of what some might call a content-overload for consumers, capturing attention is particularly key.

#7: Greater Optimization Opportunities

How much of your latest blog post did readers consume? Did they re-read parts of it? Or come back to it later and read it again? Did they share it with friends? The truth is, it’s pretty hard to answer these questions on text-based content. Video, on the other hand, has this feedback loop built in. Measure click-through rate, drop-off points, or number of times watched. You can even drill this down to an individual level. It all boils down to this: the feedback loop for videos means you know what’s working and what’s not. Now to focus on more of the stuff that’s working!

#6: More Video-favored Technology

With the increased consumption of video and the resulting rise in production, technologies are leaning more and more towards favoring the video-marketer. Consider Facebook’s addition of the auto-play for example. It’s hard to argue that a status update or link to an article demands as much attention as a video in your newsfeed.

#5: Better Email Click-Throughs

You slaved over that email copy for days and it contains important information for your customers! But does it resonate? Will it drive results? Will recipients even read it? Enter: video. The use of video in emails has been shown to double click-through rates.

#4: Higher Retention Rates

65% of viewers watch more than half of a video, which is more than we can say about the typical text-based content out there. So if you have a message to get across (and why wouldn’t you if you’re creating content?), video might be the way to go.

#3: Rise in Accessibility

While creating a video used to take many months and many thousands of dollars, the production of great video content has become much more affordable in the last few years. Companies like VideoMakerFX, GoAnimate, and Sellamations make the creation of video as easy as writing a blog.

#2: Stronger Emotional Connections

Video is the most powerful way to evoke emotions online. It’s king because it offers a slew of attributes above and beyond traditional content like tone of voice, face expressions, and music, to name a few. While you may not have feel the immediate need to run out and buy a product from an emotion-filled video, they will likely be at play later on in a more subtle and subconscious way. Evoking emotion in marketing has been proven to positively impact consumer decision-making, even in B2B markets.

#1: Increased Customer Conversions

The number one reason for using video in your content marketing plan? Video converts more customers. Simple, right? Recent research shows that 71% of marketers say video conversion rates outperform other marketing content. So what are you waiting for?
Comment

5 Quick Tricks & Tips That Will Improve Your Sports Photos

Comment

5 Quick Tricks & Tips That Will Improve Your Sports Photos

With the 2016 Olympics in Rio in full swing, a lot of people see the amazing imagery captured by various news outlets and think “boy, I wish I could do that”. So I thought I’d do a quick blog post and offer up 5 tips that will help the next time you head out to capture that sporting event, be it a Cubs game, or your child’s weekend soccer event.

Helpful Tip 1:

The worst place to stand on the field or court is the fifty-yard line or the half-court line.  So many times, I've see new sports photographers go out for their first event, and they end up planting themselves there, thinking that they will be able to see both sides of the field from that viewpoint. All this does is assure that you’ll miss all of the action occurring at both ends of the field or court… and therefore you won’t get those amazing “scoring shots”.

Helpful Tip 2:

Don’t just focus on the winning team.  Sometimes the most impactful sports photos are of the facial expressions of the athletes on the losing team. Think about that, especially if your vantage point gives you access to the losers. We all know the impact of sports on human emotion, and “losing” is the ultimate heartbreaker for many, and properly framed, your image can truly speak volumes about the outcome.

Helpful Tip 3:

Consider shooting in JPEG.  Generally, you’ll be able to capture 2 more frames per second, and the buffer on your camera won’t fill as quickly.  This can really help you to capture the perfect moment. I realize this may be counter to many of you who like to capture RAW files and thereby have greater flexibility in post production, but depending on the level and quality of your equipment, sacrificing that flexibility in order to capture “that moment” may well be worth it… experiment the next time you’re out and see what you think!

Helpful Tip 4:

Learn to shoot with both eyes open.  In fast-moving games like soccer where the ball can suddenly be kicked 100 feet or more, you can look with one eye open and see the ball more clearly and the other eye open in your optical viewfinder to place that ball within the frame.  It’s tricky at first, but can really help capture many more shots of the action.   The camera won’t block your view of the left eye because usually you’ll be shooting in portrait mode when shooting sports.

Helpful Tip 5:

Consider kneeling down on the ground and using a retractable monopod.  Shooting up at people makes them seem more powerful and “larger than life".  This adds a lot of drama to your sports images.  Plus, using the monopod will help you to keep the camera steady in this less-than-stable shooting position.

Comment

5 Tricks To Capture Awesome Musical Event Photos

Comment

5 Tricks To Capture Awesome Musical Event Photos

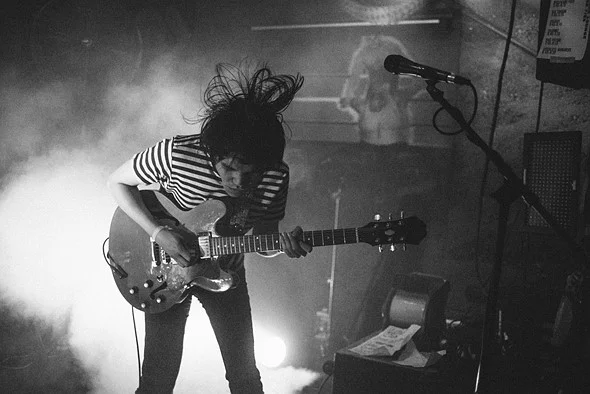
With the recent conclusion of another lollapalooza here in Chicago, I thought it would be great to offer up my thoughts (and helpful tips) about successfully shooting musical events. So whether is a “stadium rock blowout” or that favorite “hole in the wall” in your neighborhood, here’s some tricks to capture your favorite band. Remember, experimentation is a key ingredient in creating great art, so don’t be afraid to try new and different things when shooting!

Trick #1:

Be ready for the unexpected. Know what kind of stage the band might perform on. Watch them live on Youtube before you go (if you can find previous event footage). Also, check with the venue to make sure photography is allowed (assuming you’ve not been hired by the band or venue to capture the event).

Trick #2:

Be selective. Focus on one performer at a time to capture raw emotion and energy. If the band interacts with the audience a lot, make sure to capture those interactions, because a “fan reaction” can be classic!

Trick #3:

Find the perfect settings. At most concerts you'll have to set your ISO at a minimum of 800. Sure, you'll get noise at higher ISO's but it's better than a poorly lit photo. Your aperture needs to be at f2.8 or lower. At f1.8 more light will enter the camera allowing you to use a faster shutter speed. This also means you have to be very accurate with your focus. Also, consider a shutter speed at 1/125 second or higher. For hand held photography, be sure to use the reciprocal of your focal length as a guide. For example, if you are shooting at 200mm, then shoot at 1/200 second faster for sharp images.

Trick #4:

No Flash – more or less. Flash ruins the stage lights plus if you're far away from the band then it wouldn't help anyway. Refs back to my “trick #3” for making sure you’re using the right settings so you won’t need flash in the first place.

Trick #5:

Be sure to wear earplugs! If you get the chance to get up close, you'll want a few pairs at all times in your gadget bag.

To Wrap It Up

Remember, music can soothe the soul, lift the spirit and create amazing times that provide memories that last forever. And capturing your musical experiences through inspiring images is a great way to share and preserve those wonderful moments.

Comment

Simplifying "MACRO" Photography

Comment

Simplifying "MACRO" Photography

I thought it was time to discuss one of the most popular forms of photography, MACRO. and with good reason. A very broad genre of photography, shooters enjoy capturing macro shots of leaves, flowers, and sluggish insects, all the while maintaining total control over lighting. If you are a nature lover, you can invest vast amounts of time searching for ideal situations be it flowers, bugs, or even a shiny penny left on the sidewalk. Plus, macro photography makes it possible to take great “nature” photographs without traveling far beyond your environs.

But there are some technical hurdles to cross. Physics interferes with macro photography in ways that are not as relevant in other areas of photography, but it’s important for you to understand if you’re going to properly capture macro images. 

Magnification Parameters

Macro photography has to do with the size that your subject is projected onto your camera’s sensor. If you have a one-inch subject, its projection at “life-size” would be one inch on the camera’s sensor. An object which fills one inch of the sensor will fill most of the resulting photo, since the sensors in typical DSLRs are no more than 1.5 inches long. When an object is projected at life-size onto the sensor, it is at “1:1 magnification”. If an object is projected at half of life-size (say, that one-inch object takes up just 1/2 inch of the sensor), it is at 1:2 magnification. With 1:10 magnification or smaller, you aren’t really shooting a macro photo anymore.

Figuring Out The Working Distance

Working distance is easy: it’s the distance between your sensor and your subject at the closest possible focus distance of your lens. The longer the working distance, the easier it is to stay away from your subject (and if that subject is skittish or dangerous, a large working distance is fairly useful). A working distance of ten inches means that, with a camera/lens combo of eight inches long, the front of your lens will be two inches from the subject at its closest focusing distance. The best macro lenses, as you might expect, have large working distances — a foot or more. The working distance increases as the focal length of the lens increases. To give you some content, the Nikon 200mm f/4 and the Canon 180mm f/3.5 are two good examples of macro lenses that have large working distances.

So What About DSLRs vs Mirrorless?

For macro photography, either DSLRs or mirrorless cameras will work just fine. If you’re looking at native mount options, DSLRs are going to be ideal due to the large choice of available macro lenses (particularly longer focal length macro lenses) and accessories. Having some sort of "live view" on your LCD is handy, since instant feedback lets you know the image framing, which allows you to detect small hand movements that can lead to big shifts in your overall composition.

Do You Need Full-Frame or Crop-Sensor?

If your goal is to create photos with the highest magnification possible, full-frame cameras are usually overkill for macro photography. Even the Nikon D810 with 36 megapixels cannot match the magnification of the 24 megapixel Nikon D7200, simply because the pixels on the D7200 are smaller. With macro photography, the highest pixel density (most pixels per square millimeter of the sensor) is what determines the maximum magnification of the subject. The large- sensor D810 has fewer pixels per millimeter than the smaller-sensor D7200, despite having more total pixels. In many genres of photography, larger pixels are preferable.

With macro photography, though, the smaller pixels lead to more magnification, even at the expense of sensor size. That being said, large-sensor cameras certainly have other advantages. If you take photos that aren’t at maximum magnification, full-frame cameras have a distinct image quality advantage. For example, you probably wouldn’t want to take a photo of a crab as close as you can focus, because the final photo would not have the entire crab in it! In this situation, the larger sensor and higher pixel count of, say, the D810 would give you a real advantage over the smaller- sensor D7200, even though the D7200 has more pixels per millimeter. So, a full-frame DSLR is still generally better for macro photos than a cropped-sensor camera, but the advantage isn’t as large as in other genres of photography.

Wrapping It All Up

There’s a great deal of technical terms related to macro photography, but the most crucial is magnification. When you understand the differences between, life-sized images and 1:4 images, you already know the most crucial macro-specific terminology that you’ll need.

To make sure you know my bias, I do feel that Nikon cameras are technically the “best” for macro photography, but you can take great macro photos with any camera, even compacts. Macro photography is extremely accessible, which is what makes it so popular among both beginners and professionals. If you’d like to chat more about this cool segment of photography, contact me

Comment

What To Look For In Drone Imagery Providers

Comment

What To Look For In Drone Imagery Providers

Our partner, Elevated Exposures, LLC, offered this informative post on finding the right drone provider for your advertising and marketing needs. We've worked with them extensively for our clients to use this exciting new technology as yet another way to solve our client's greatest marketing challenges.

Having been in advertising for over 3 decades, I’ve provided marketing & advertising strategy and content to companies from start-ups to Fortune 500 firms… and now that my business is focused on aerial imagery, I’d like to share with you the key factors in developing an effective marketing message via drone. My goal is to help you build and maintain a strong visual presence on the web and in print by using this unique, cutting-edge style that will resonate with your target audience.

This content of this post is meant to help anyone who is in need of hiring a professional FAA approved commercial drone operator for aerial photography or video.

Look at Their Portfolio

Before hiring any marketing and advertising professional, you should look through their past work and be sure that you like what you see.  Why? Because you can expect that your final results will be very similar. This isn’t a scientific process, it is very subjective. Look over a portfolio and compare it to others. When you find one or more that you like, you’re ready to make contact with the drone company. Remember that just like with regular photography and video, anyone with the money to purchase equipment may run out and start selling you their services. For this reason, there is an enormous variance in the quality and professionalism of the work out in the market and it makes good sense to look at their portfolio before wasting any time communicating with them.

Check Their FAA Certification

Unlike regular photographers and video professionals, a commercial drone operator must be certified by the Federal Aviation Administration (FAA) to operate legally. The operator must hold paperwork known as an FAA Section 333 Exemption to conduct the drone operation. Hiring an FAA certified drone operator is important in order to help insure that they operate legally and will not expose you or your company to any unnecessary risk or liability. To find out whether the company you’d like to hire holds an FAA certification, just ask for a copy of their FAA exemption certificate… if they can’t produce one, move on!

Make Sure the Drone Operator is Insured

While not yet required by the FAA, it is important that any drone operator you hire holds drone insurance. General liability policies and umbrella policies do not cover drone operations unless it is stated on the policy expressly. Chances are your policy will NOT cover a falling drone either, and so it is important that someone hold coverage for this particular type of operation. Over the years I’ve been flying drones – I’ve seen drones drop out of the sky due to various failures a few times. If the drone operator is uninsured and an accident occurs, both the drone operator and you as the hiring party could be held legally responsible for any damage or injury. So the main question to ask is: Why would you expose yourself or your company to increased risk by hiring an operator who is uninsured? Professionals carry insurance… again, ask to see their insurance certificate, and if they cannot proceed one, walk away.

Compare Pricing

This is a given when hiring any contractor! Many individuals shop solely on price when quality is not a primary concern. The search for the lowest bidder happens in every industry and we encounter it all the time with drone operations. As an aerial imagery professional, I of course, would like to be paid as much as possible for my time. So I hold a heavy bias on this topic. Some old crusty photographer stated to me once “They’ll ask you to come out with $10k worth of equipment to shoot, and then offer to pay you a few dollars.” Realize that a professional drone operator – like any freelance photographer or videographer, has significant operating expenses as an individual or small company. These expenses include equipment, liability insurance, travel, merchant fees, data storage, web hosting, advertising, and health insurance — to name a few. Those expenses don’t mean anything regarding value for the client, however. What’s important for a client to look at is the balance of final output, expertise at their craft, customer service, professionalism, and good, solid communication which a visual media professional provides.

Ask For a Contract

It is incredible to me how many aerial imagery providers operate without contracts. A contract is designed to protect both parties for the business transaction itself. In the case of photography and video it is essential to have everything in writing from the professional you hire so that there is no question regarding the deliverable you receive once the work is completed. Regarding drone operations, it is extremely important for the client to secure a written contract so that the work to be completed is outlined, and additionally – so that any parties needed to give permission for over-flight of property are listed on that contract.  A drone operator may not fly over property for which over-flight permission is not given! Putting this information in writing protects both the hiring party and the drone operator from liability. For example, the drone operator must agree to keep the drone flight over the area which the client has control and ownership of. Should the drone operator deviate from that airspace and crash the drone into a neighboring property, causing damage – a written contract would provide the client with some protection from liability.  A drone operator may not expose random persons or property not involved in the operation to risks that they are unaware of!

If you'd like to learn more, please fill out our contact form and we'd be happy to do a free, no-obligation phone consultation with you.

Comment